Toyota GR Yaris Forum banner

VBD GR Yaris lowered seat frame installation guide.

13K views 19 replies 10 participants last post by  Jon Fossard  
#1 ·
Installation guide.

For reference,pictures are for RHD cars.

Parts included in kit :

1 x subframe

Image


2 x outrigger brackets
Image


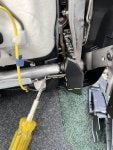
1 x Replacement shortened handle

Image
Image
Image
Image
 
#3 ·
Make sure ignition is OFF during installation ✅

(1) Raise drivers seat to its highest position using adjuster on outside of seat.
This will allow easier access to disconnect the
electrical connectors underneath the seat.
Unclip electrical connectors.

(2) Remove the four T50 Torx bolts located at each corner of the runners.
The seat is now ready to be removed.
Care is needed to not scratch plastics,steering wheel etc.
Image


(3) Set down seat on a protective surface at a good working height.

(4) Remove this plastic trim

Image


from the seat and runner along with these four plastic end trims from the runners.


Image


These parts won’t be used again.

(5) The plastic trim shown in these pictures needs to be trimmed.

These will catch in the new lowered position

I recommend cutting flush to steel seat brackets that bolt to runners.
Image

Image


(6) Remove the eight 12mm nuts (5 on passenger seat) holding the runners to the seat.
The runner can now be removed.

(7) Take a small flat head screwdriver and push gold tab as in the picture
Image

Image


lever upwards and pull on handle to remove.
Repeat on other side.

(8) Take your two outrigger brackets

Image


These are marked up for inside and outside of seat.Bolts are pre-installed in correct holes to aid in installation.

Bolt the outriggers to your seat.

5mm Allen key and 13mm spanner required.

(9) You are now ready to bolt the runners back on to the outrigger brackets using the original 12mm nuts.

(10) Bolt the subframe into the car using the four original Torx bolts.

please note: front of subframe has four holes each side.
Image


(11) Seat is now ready to be bolted back into car.

First off,decide if you would like the extra 25mm of legroom offered by bolting runners in one hole further back on subframe.
Subframe comes supplied with bolts in original position ✅

(12) Take the 10mm button head bolts and place one washer inside of runner before bolting runner to subframe.

(13) Reconnect electrical connectors under seat.

(14) Take replacement handle and push into ends of runners until it clicks.

(15) Lower seat into its new and improved position 🤗

You are ready to drive.Have fun 🤩
 
#4 ·
Really good installation guide!

On the piece of trim which needs trimmed - does it have a part number? Just thinking - could just order up spares to avoid cutting the original parts. Although on closer inspection - it’s perhaps integral to the seat? Do you have any more pictures of what needs to be trimmed?
 
#7 ·
Thanks Jon. Based on that does sound like the only option is to cut the plastic part on the seat. Wonder if it would be visible if ever put back to standard height? Or is it completely in earth and not visible?
 
#14 · (Edited)
Installed my VBD kit today. A few photos that might help others. Also some photos of seat in car, you cannot see any cut lines. I had the camera on the floor and it's impossible to see. I was a bit hesitant at first, new car with multi tool whacking seat plastic, but honestly you can't see anything. New position is fantastic and combined with Astra J rear view mirror I can see again!
Thanks!
 

Attachments

#15 ·
I did mine today. done both seats. as the outrigger brackets came non marked, here is a pic how it should look like when they are installed.
Image

what is missing in the instructions is that if you are doing the passenger seat, there is no need to losen the nuts of the tilting mechanism. you need though move the cable bracket or the cable itself within the bracket, as the cable to the airbag would be too tight:
Image

Image

the yellow connectors are fiddly, the cable brackets even more. both seats took me appr. 5h, wasted some time figuring which outrigger bracket goes how and which side. the cutting is only needed on drivers seat.
it was a horrible job (for me at least) but worth the effort. 1st test drive and all pain is forgotten 😀
 
#18 ·
Image

Image

Hi all, first off great kit from jon Fossard (vbd)
I know some of you buy the drivers seat rail one only, but if you are thinking of buying both do it.

Reason for this post some of you are probably unsure if you want to go for the passager side as there isn't a fitting guide & to be honest it's quite easy to do ( once I figured it out) 🤣 so just to help a few members who are thinking I wished I bought the passager side one now! 🙄😅 heres a few pictures just to help you along. Same as drivers side follow the guide that jon put up. Once the seat is out & laid down you can see the rails.

1. Do not unbolt the 2 nuts on the pictures I have circled (red) they will stay intact on the rails. You will see a bit further down the line

2. You don't need to remove the cable (green)

3. Follow the cable to left hand side & go to rear & just under cloth you will see the clip, unclip (circled blue) this will give you more slack when you come to unbolt the rail. this doesn't need to be clipped back in once removed. (Cable)

4. I found it, easier to remove the grab handle seat slider before removing the rails. (See drivers guides on how to remove)

5. Unbolt the 3 nuts & rail is now free, fit vbd inner bracket & bolt up with the nuts supplied fit seat rail to inner bracket using the existing bolts please note that the rail with 2 bolts I said don't undo (circled red) that mech now sits in the inner cut out of the vbd inner bracket.

6. Undo the 2 bolts on opposite side rail no cables to remove & fit vbd inner bracket please note how bracket sits on this one due to not being flat see photo (yellow) then bolt rail on & tighten all bolts

7. Fit bracket to car chassis using existing bolts & lift seat in ( don't forget to reconnect cables under seat) & bolt up seat with bolts & washers supplied. Use 17mm spanner & 9mm Allen key.

Sorry pictures haven't gone in order of my write up. 😬

Passager seat is now installed.
Image

Image

Image

Image

Image

Image

Image
 
#19 ·
Fitted my seats lowering kit today - took 2.5 hours. All pretty straightforward - I would echo earlier comments that you need to do both as the lowered driver and non-lowered passenger seat looks a bit odd. Passenger seat is easier too. Final point - all car seats now are bloody heavy and it’s really a two person job to get them out and in safely and without scratching the (surprisingly soft) door surround plastics.

And the lowered seat makes a massive difference to the driving position!